How to Install DIY Built-In Bookshelves: A Step-by-Step Guide
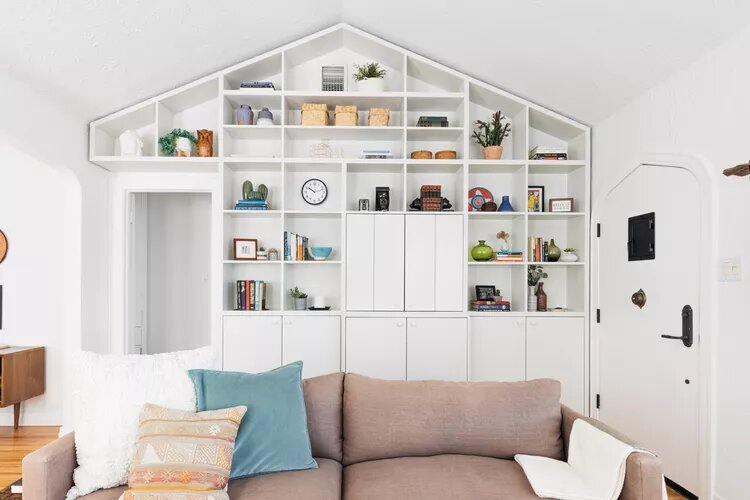
Creating a space that seamlessly blends functionality with aesthetics is a goal many homeowners aspire to achieve. DIY built-in bookshelves not only add character to a room but also provide practical storage solutions. In this comprehensive guide, we’ll walk you through the step-by-step process of installing your own built-in bookshelves, turning an ordinary wall into a focal point of sophistication.
1. Measure and Plan: Lay the Foundation for Success
- Begin by measuring the wall where you intend to install the built-in bookshelves. Consider the height, width, and depth of the shelves.
- Take into account any existing features like windows, outlets, or switches, ensuring your design accommodates these elements.
- Sketch a detailed plan, incorporating your measurements and considering the overall aesthetic you want to achieve.
2. Select Materials: Choose Quality for Durability
- Decide on the material for your bookshelves. Plywood is a popular choice due to its affordability and versatility, while hardwood provides a more luxurious finish.
- Consider the finish and paint color to match your room’s decor. Pre-painted or laminated plywood can save time during the finishing phase.
- Purchase additional materials such as screws, wood glue, and finishing nails based on your design and measurements.
3. Remove Baseboards: Prep the Space
- Begin by carefully removing the baseboards along the wall where the built-in bookshelves will be installed.
- Use a pry bar or utility knife to detach the baseboards, taking care to avoid damaging them if you plan to reuse them later.
- This step ensures a seamless fit for your bookshelves against the wall.
4. Build the Frame: Lay the Groundwork
- Construct the frame of your bookshelves using the selected material. This will include the vertical sides, horizontal shelves, and any additional support structures.
- Use a level to ensure the frame is straight and secure. Connect the pieces with screws and reinforce with wood glue for added stability.
- Consider incorporating adjustable shelving to accommodate varying book heights and decorative items.
5. Attach to Wall: Secure for Stability
- Carefully lift the frame and attach it to the wall using screws and wall anchors. Make sure it is level and securely anchored to the wall studs.
- If your built-in bookshelves span the entire wall, install vertical supports at intervals to distribute weight evenly and prevent sagging.
- Double-check the level and alignment as you go to avoid issues in later stages of the installation.
6. Add Trim and Molding: Finishing Touches
- Enhance the visual appeal of your built-in bookshelves by adding trim and molding. This not only conceals gaps but also gives a polished, custom look.
- Use a miter saw to cut the trim at precise angles for a professional finish. Attach it to the edges of the bookshelves and against the wall.
- Fill any gaps or nail holes with wood filler, sand the surfaces, and prepare for the final finish.
7. Paint or Stain: Bring Your Vision to Life
- Choose a high-quality paint or stain to finish your built-in bookshelves. Consider the room’s color scheme and the overall style you want to achieve.
- Apply multiple coats, allowing sufficient drying time between each layer. Sand lightly between coats for a smooth finish.
- If you prefer a natural wood look, opt for a clear sealant or wood stain that enhances the grain.
8. Install Backing: Optional but Stylish
- While not mandatory, adding a backing to your built-in bookshelves can enhance their appearance and provide additional stability.
- Consider using beadboard, plywood, or even wallpaper for a decorative touch. Attach it to the back of the bookshelves with nails or screws.
9. Reinstall Baseboards: Complete the Look
- Once the built-in bookshelves are securely in place, reinstall the baseboards you removed earlier.
- Cut them to fit precisely against the bottom of the bookshelves for a seamless integration.
- Secure the baseboards with finishing nails and wood glue, ensuring they align with the existing room trim.
10. Decorate and Organize: Personalize Your Space
- Arrange your books, decorative items, and personal touches on the shelves to create a visually appealing display.
- Consider incorporating baskets or bins for additional storage and a clean, organized look.
- Add personal touches such as framed photos, plants, or decorative accessories to infuse your personality into the space.
By following this step-by-step guide, you can transform an ordinary wall into a stunning showcase of both style and functionality. DIY built-in bookshelves not only provide ample storage but also become a focal point that elevates the entire room. Whether you’re a seasoned DIY enthusiast or a novice looking for a weekend project, these steps will help you create a customized space that reflects your unique taste and enhances the overall ambiance of your home.

